Saturday, October 31, 2015

Autumn Flowers and clearance plants

County Fair Zinnias and Autumn Beauty Sunflowers are beginning to bloom.


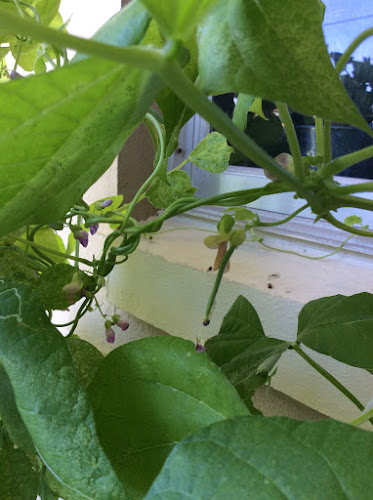
My rattlesnake pole beans are suffering from spider mites and some sort of chewing insect. I'm planning on making an onion and soap spray to try to deal with them.

In spite of the bugs, they continue to grow and are even putting out little green beans. Maybe I'll have enough for thanksgiving!

These were all on the clearance rack at Lowes for just $3 each! From the left there are two Ischia Green Figs (supposedly a very heat hardy slightly smaller variety with very sweet figs), a Sunshine Blue Blueberry bush (self pollinating, compact 3' bushy plant with excellent blueberries), and two Dwarf Everbearing Black Mulberry bushes.

You can see the difference unrestricted growth in good dirt makes for the mulberries. These are the two I potted up about a month ago. They are fast growers and I'm hoping that the new ones bounce back quickly.

The new mulberries were seriously root bound, so I used a clean sharp knife to cut off about the bottom two inches of thick roots circling the pot. The picture above is after the trim. The photo below is what I removed.

I potted them in larger two gallon pots with mushroom compost and sand from my garden. With the roots trimmed up they now have plenty of room to grow until the new garden bed is ready. I also pruned off any dead or poorly placed branches from all the plants.


Monday, October 26, 2015

Sometimes Florida Sucks.

The title pretty much says it all. Sometimes gardening in Florida just sucks. Our growing seasons are hot and long and winters very mild and usually frost free which allows for the often unchecked growth of the appropriate tropical hardy plants and fruit trees. We can have bananas, papayas, oranges, sweet potatoes, hot peppers and tomatoes growing almost year round. The nearly limitless amount of things we can grow is definitely a plus. But with these tropical conditions come some serious disadvantages too, namely in the form of pests and humidity. Folks from up north feel like they can't hardly breathe when they come down here for the 98% humidity in the middle of a summer day. They describe it as breathing water. It can be oppressive for many plants too and a transmitter of a host of problems. I'm pretty sure that the high humidity is why my poblano pepper is still dropping its tiny pepper buds.

But on this 85 degree fall day, the thing that has me in near tears are the pests. I lost my corn to army worms a few weeks ago. My peach tree has been seriously attacked by weevils, a non native species that has been introduced and gaining ground here over the last few years. None of our native or localized predators seem to like the Sri Lanka Weevil and it is carving a path through just about everything. It's food list is as long as my arm. So my poor peach tree has deep chew marks on nearly every leaf. I'm trying desperately to save it and am this. close. to breaking out the hard synthetic pesticides.

I lost half my cucumbers to root knot nematodes at the same time my corn went kaput. My Nevada lettuce transplants that I started from seed and wrote about a couple weeks ago were completely mowed down two days ago in the garden, maybe from snails, maybe something else. Something chewed through and killed a couple of my sugar pumpkin vines, but I cut them open and didn't see any vine borers.

My pole beans are suffering from spider mites, and now my remaining cucumbers are being attacked by them as well.

In spite of it all, I was remaining optimistic. I bought a four pack of Celebrity Hybrid tomatoes this morning. They are resistant to darn near every wilt, virus, and even nematodes. So I planned on putting them in the garden an hour ago. But then I saw even more damage.

Overnight, my hybrid sangria ornamental pepper seedling which had been thriving and was a bushy 2" tall was chewed to a stem. My ornamental 2 yr old Purple Flash pepper (see pic) which was filling out really nicely was completely defoliated. And the larger of my two Black Krim tomato seedlings, a nice 3" tall healthy plant yesterday, is now a .5" leafless stub. It wasn't even planted yet. It was just sitting in a nursery pot in the garden.

I am so disheartened. I looked around in the garden and tilled the soil a bit around the purple flash pepper but didn't find the culprit, just some nice looking earthworms. The lack of pest indicates that the cutworms are most likely the culprit and that without the corn to entertain them, they have moved on to my Nightshades.

I'll be spreading diatomaceous earth over the soil at dusk since they tend to come out at night and hope that I can get them under control in the next couple days so I can plant my Celebrity tomatoes. If the DE doesn't take out the cutworms, I will have to look for a bottle of Bt, like Thuricide to fight them.

I don't even have the hope of winter killing back the pests for an early start next year because winter doesn't usually go below 45 degrees here. And the last several years it hasn't even gone that low. That means a wonky season for my peach tree and possibly too few chill hours. And the cool season veggies are quite susceptible to damage from pests like cutworms and nematodes. So, I don't know quite what to do next.

Hopefully the tiny top bunch collards that have just sprouted in the garden don't get leveled by the cutworms tonight, but I won't count on it.

I watered my remaining plants with a strong vermicompost tea that I've been brewing the last few days and will put some in a spray bottle to try to deal with the spider mites tonight also. Maybe it will give the purple flash pepper the needed verve to bounce back.


Wednesday, October 21, 2015

The demise of Corn, Root Knot Nematodes (RKN) and Cucumbers

A couple days ago I decided to pull out my corn plants. I had lost several already and the crop was in decline.

Corn dusted with DE
Army worm damage

I had applied at least three dustings of diatomaceous earth (DE) to try to kill of the army worm larva that were hiding in the whorls of the plant and in the soil during the day then would come out and munch the leaves at night.

Tiny destructive army worm

All that trouble was caused by tiny army worms just a 1/4 to a half inch long. So I pulled the plants, tilled the soil, added vermicompost and planted some top bunch collards in the four square feet.

This morning I was checking on the garden and noticed what appeared to be powdery mildew on some of Sumter Cucumbers. I immediately pulled the plant out instead of trying to save the stunted plant.

Probably Powdery Mildew

In spite of having planted the Sumter Cucumbers only a weekish after the Russian Cucumbers, the Sumters were less than a third of the Russians and clearly failing to thrive.

This little cucumber with the yellowish leaves is a Sumter. It only has three large leaves and is only up to the second rung of the tomato cage. It was the largest of my Sumters.

These big healthy cucumber plants are the Russians. You can see they have grown taller than the tomato cages, even outgrowing the vigorous sunflowers, and they are setting flowers.

A closer inspection of the plants roots reveals the reason for the Sumters failing health.

The root system is barely developed. The squash family (cucurbits) are prolific rooters to feed the large plants so this again signals a problem.

Root Galling from RKN

An even closer look shows why. Notice the round bumpy nodule like roots? Those bumps are called galls. They are caused by the plant trying to protect itself from the infamous pest of sandy soils, the Root Knot Nematode (RKN). Most vegetables are susceptible to injury from this bugger. I would say the Nightshades (tomatoes, Eggplant, Peppers, white Potatoes) are the most susceptible, but Cucurbits are also affected. The RKN is a microscopic soil dwelling round worm that feeds off the juices in the roots of plants. Plants form galls in an attempt to isolate the RKN, but ultimately the roots are damaged and stunted. This leaves the plant malnourished, thirsty and vulnerable to attack from disease and other pests that an otherwise healthy plant may be able to cope with.

Root Galling from RKN

The Sumter variety of cucumbers must be particularly vulnerable to attack. The last three or four times I've attempted to grow them I haven't had good results and only a couple, if any, cucumbers. Thinking back to the first time I grew them and was rewarded with dozens of cucumbers from just a few lively plants, I can easily pin point the reason for my success.

I had just made a brand new square foot garden following the Mel Bartholomew's method exactly. I had made 6" deep beds set on top of plastic landscape fabric and filled with NEW dirt made of 1/3 peat moss, 1/3 vermiculite and 1/3 compost and started the garden in early Spring. So guess what that meant? There were NO RKNs hiding in my garden soil. Of course inevitably they did migrate in and that soil began yielding poorer and poorer results. I blamed this on the shallow soils inability to hold water in our sunny hot humid climate. This I'm sure was partially true. But the constant decline of my plants was surely due to RKN damage.

I fear that I have greatly underestimated this nemesis over the years and may have blamed some of my garden's troubles too much on other problems. I will not be making that mistake again.

So where to go from here?

Well, I will be focussing my efforts on plant varieties that are RKN resistant in the future. This will be an all around boon as the plants will need less water and less fertilizer to compensate for the damaged roots. So no more Sumter Cucumbers. I am curious to see if at the end of the season my Russian Pickling Cucumbers have less galling of the roots and may be a RKN resistant variety. Their vigor suggests this may be the case.

Will I toss all my seeds that aren't RKN resistant? No. But if I really want to grow them, I'm going to have to look at container gardening with fresh store bought dirt every growing season (big sigh). So I'll limit myself to just a couple crops that I really want, but need the special treatment. This will probably be my Nightshades. And I may transition some of them out when I run out of seeds and in the future use RKN resistant varieties only.


Monday, October 12, 2015

Seed starting in Plastic Containers

I started my lettuce seeds today. I am hoping to transplant them to the garden as soon as my fall crops are spent sometime around Thanksgiving. By starting the seeds now I'll be harvesting my first salad sooner and have a shortened time between harvesting crops. This method of crop rotation is used in smaller gardens, such as my raised bed gardens, and is called succession planting.

I used these plastic containers that had pastries in them to make my mini greenhouses. They can be re used multiple times, but wash them in soapy water between uses to prevent the spread of disease such as damping off. Use a light, loamy seed starting mix or something with loads of vermiculite. You can even use just vermiculite or a mix of vermiculite and peat moss. I fluffed the soil by mixing it in a clean bucket with a small hand rake, and then gently scooped it into the bottom half of the containers until they were filled.

Next I used the edge of a thin piece of cardboard to make little blocks evenly spaced in the soil. This will help with seed spacing and transplanting down the road. If you are using just vermiculite then just make lines and don't worry about trying to get the soil into fluffy cubes. Alternatively, you could use a taller plastic container like the kind lettuce comes in and set newspaper seed pots filled with your seed starting medium inside the container. I strongly recommend this if you are starting something with an aggressive tap root like cucumbers or squash. It will help prevent the roots from becoming tangled.

My containers hold about 20 1inch cubes of soil. In each cube I placed two lettuce seeds right on top of the dirt. (The magenta lettuce tray shown has a higher density of seeds because I let the boys help me plant.)

Use a spray bottle set to a fine mist to soak the top 1/4 inch or so of your soil making sure to get the seeds nice and moist. If you are using a peat/vermiculite mix go a little heavier on the watering.

I then used the tip of my finger to gently press the seeds into the soil (but don't bury them!) to ensure good contact. This helps with germination.

You can just see the tiny sliver shaped lettuce seeds laying in pairs on top of the soil in their little squares. Close up the container and keep it in a location with even temperature and out of direct sunlight.

I keep my containers on a back corner of my kitchen counter. This may not work for everyone though depending on the temperature of your home and time of year. You can check the temperature of your soil with an instant read thermometer like a digital one used for cooking meat to make sure you are hitting the ideal sprouting temperature for your seeds. Lettuce likes a cooler soil in the 60-70 degree range with the optimum sprouting temperature being 68 degrees Fahrenheit.

I like to check Johnny's Seeds for the temperature range I should shoot for.

This is the optimum range chart Johnny's provides on their site for sprouting Magenta Lettuce. You can see that the seeds really don't sprout as well outside of 60-77 degrees.

Some seeds like Peppers really need the heat to sprout.

This chart from Johnny's shows that pepper seeds like a temperature range of 80-90 degrees F to germinate well. I can usually hit this temperature by sticking them in the top shelf of the closet where my hot water heater is or by using a heating mat. I actually just use a medical type heating pad like you would use if your back was sore. I sandwhich it between a folded towel with my mini seed greenhouses set right on top. I turn it on low and then check the soil temperature in an hour to see if it has hit the optimum range. If need be, I will turn it on medium, but that's not usually necessary. My heating pad has an automatic shutoff after about 30min, but because the lid on the container stays closed it traps the heat and I only need to turn the heating pad on every four hours or so.

Even temperature and moisture will give you the most success with getting your seeds to sprout.

Next time, I'll give some tips on caring for your seeds once they do sprout and talk about thinning out and lighting requirements.


Saturday, October 10, 2015

A Viburnum hedge in bad dirt

My last post was about using what you have to build a garden bed right in bad sandy soil. I can't wait to show you what this little bed will do and how it looks in a few months, but before then, I'll show you another bed I prepared in a very similar fashion. After all, the proof is in the pudding.

This is a nearly identical setup to what I did yesterday, but this this bed is almost two years old. I double dug this bed Two feet deep and mixed in piles and piles of mouldering oak leaves in the bottom of the trench. I filled it in with about a bag of slow release fertilized dirt (what I had on hand at the time) on top of the leaves which really only covered the very bottom of the trench. I set the plants on top of that and then back filled in around them with more layers of oak leaves mixed with the dirt I had removed from the hole. I mulched with more oak leaves (I had a serious surplus of them laying under the tree in my front yard) and then added a thick layer of red bagged mulch on top for aesthetics and to hold the dry oak leaves down while they decomposed.

Truthfully, oak leaves aren't the best choice for this sort of thing because they breakdown so slowly, but they do work. It's especially good if they've been sitting around for a while gathering up fungi and good microbes to help with the breakdown process.

I have never fertilized these plants. I have barely had to weed here either which is quite a statement. In fact the weeds are usually stray grass shoots that have wandered over the bricks from the yard, but they can't get through the thick layers of mulch and leaves to set down roots. I also don't water this bed anymore. I did during the establishment period, but after that, I trust all that good leaf amended dirt to hold in the water. And it does.

Now, a word about the plants. These are Sweet Viburnum. I got the three of them on the clearance rack at lowes for just a dollar apiece in their 2 gal pots. They were just sticks back then, but now I have to prune them regularly so they will take up a more formal hedge appearance. Viburnums are natives that grow all over the U.S. Finding a viburnum suited to your area is really a safe bet as far as choosing plants goes. The native Viburnum here is called "Walters Viburnum" and is rather tricky to track down at nurseries. But it's cousin, Sweet Viburnum, is an excellent stand-in.

If you are looking for easy plants that will grow well with much less work, find out what is native to your area. Use those if possible, if not, choose something in the same plant family, a cousin if you will, and plant it. Not only will grow great if you've met its needs, it will look more natural in your area. I have several plants that I have to fuss over and fertilize, but any natives or native cousins are self sufficient once established and if I've planted them in the correct location as far as sunlight requirements go.


Friday, October 9, 2015

Planting a new plants in bad dirt

Some people love a good thrift of garage sale find. They just love the thrill of the hunt or pleasure of the unexpected perfect item or paying a third of retail cost for that expensive designer pair of jeans. I feel that way about the clearance rack at garden stores. Finding a plant that looks like this makes my day.

Because with a sad looking plant comes a sweet price tag.

I hadn't expected to find cocoplums on the clearance rack at lowes, but while I was in there looking for something organic to kill cutworms, I checked out the offerings of fruit plants and the clearance racks. This isn't my usual Lowes but I had time to kill between Drs appointments a couple towns away, so I was super excited to score these guys. And I learned that this lowes has a better selection of natives and zone appropriate fruit trees. I even found rainbow eucalyptus there and I was this. close. to buying one. But I don't have a spot for it. Anyway, first order of business when buying clearance plants is to see if they can be nursed back to health. This was the best of the plants available and you can clearly see all the new branches and green leaf buds along the existing bare stems. New growth = very much alive.

The other plants weren't quite as good looking but they all had plenty of new leaf buds forming along the stems. I was satisfied. Sometimes plants get moved to the clearance section if they are annuals between blooming in need of dead heading or if they are dormant leafless trees of shrubs. In our sub tropic climate, dormant plants don't sell well because consumers are used to the evergreen state of plants here. Even deciduous trees don't completely drop their leaves here as they do up north. So, to check the vitals of a leafless plant, gently bend a twiggy stem and see if it breaks or feels springy. It shouldn't snap very easily and if it does, pass of that plant. If you need to, you may even intentionally snap a very small branch to see if the wood inside is green and alive or brown and dead. This is a good check for plants in your yard too. I had a privet go through transplant shock (my fault) and it was reduced to a mass of grey twigs. But, in spite of it being leafless for months, I didn't give up hope because the wood was still green inside and felt springy. I am happy to report that one day, seemingly overnight, it shot out a thousand new green leaves and stems and looks much more respectable now.

I didn't want to buy tons of good dirt to fill this bed so I compensated for my bad dirt (sand) by using what I had to amend the sand into something useful. I prepared the bed by setting in the bricks where I wanted them and scooping the grey sand close to the edges of the bed to form a large depression in the middle. I dumped all my kitchen scraps from the last few days in, and then I raked up bucketfuls of dry grass clippings and spread them on top. The scraps will feed and draw in earthworms and beneficial bugs as will the grass clippings. Unfinished organic material is king when it comes to improving sand long term. Your goal should be to create good soil, not just feed the plants for a little while with a quick release fertilizer or bags compost that will disappear in a couple weeks. The sand just eats up finished compost. But organic matter breaks down slowly retaining water and creating good tilth and draws in the organisms and microorganisms that will sustain the soil long term. This principle is why permaculture food forests are so successful: feed the soil and it will feed you.

Next I loaded up my cart will two loads of partially composted dirt, leaves, weeds and grass clippings. I've been cooking this pile under a tarp for the last few weeks. I didn't include anything that was still green like a couple shoots of grass I found.

You can see this dirt has a much darker appearance and higher organic matter content even with it being pretty dry. This will continue to break down and help with water retention. It will also give the plant roots a place to live until the underlying layers of organic matter finish breaking down.

Next, plant your plants! I flooded this bed till water sat several inches deep on the surface. Since the grass clippings were very dry, I wanted to give them a chance to absorb some water to hasten the breakdown process. And even with this area being flooded, the water drained completely in just a couple minutes thanks to all the sand.

And mulch heavily. I'll repeat, when working in sand, it is impossible to overdue it with mulch. Especially dry grass clippings which break down very quickly and provide immediate water retention, weed blocking and habitat for earthworms. Last week I pulled back the grass clippings between the banana plants to add some kitchen scraps and I found half a dozen earthworms wriggling right on the soil surface below the thick mat of grass clippings.

Even without watering these banana plants for days, the soil was perfect and evenly moist and you can see the grass clippings already breaking down after being here only two short weeks. Mulch has the amazing ability to prevent soil from drying out from exposure and maintain an even temperature. In winter, mulch traps heat and prevents chill from the air cooling your soil. In summer, it prevents rapid water evaporation and the sun and hot air baking the soil surface to a dry crust that eventually begins to repel water.

This is a great way to make a good new garden bed without having to buy new dirt. I didn't buy any for this bed. And the big bonus is that cocoplums are a very hardy native that thrive in drier sandy soils. Actually, I think over watering and not enough sunlight caused the leaf drop at the store in the first place. The pots were almost waterlogged and bursting with fertilizer and rich pine bark dirt, which isn't this plants native growing conditions. They can be found growing on all sorts of sandy soils, even beach dunes, but not in perfect nursery conditions apparently. They should like this sandy garden bed quite well.


Thursday, October 1, 2015

Garden Update: Oct 1

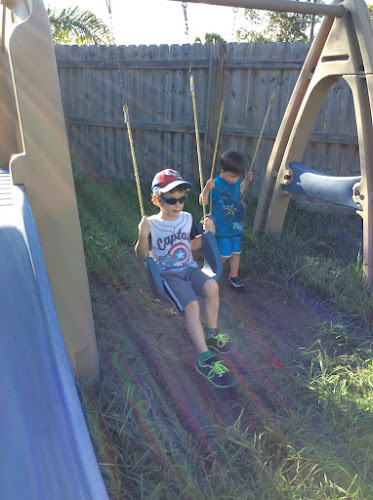
We've all been enjoying getting outside nearly everyday now that the temperature is back down in the 80's. The boys love swinging and running and having a popsicle when they get too hot. They also enjoy checking on all the baby plants that are so cute and tiny.

The pole beans are skyrocketing and will need directing to new places to climb soon. I have two baby high bush eggplants that are beginning to get true leaves and growing well so far. I've never had luck with eggplants so I have my fingers crossed that these guys will make it.

I bought two poblano pepper plants from Rockledge gardens. I fell in love with the rich dark green foliage and the plants just looked so healthy that I couldn't resist. They had flower buds forming when I bought them, but I pinched those off to encourage root and leaf growth which seems to be working. I looked online and these bad boys may get 5ft high, so I have a backup plan of transplanting them to large planters if they get nuts.

The rest of the garden is filling out well too.

This section is densely planted with sunflowers and cucumbers. The back couple square feet have more sunflowers, Amish pie pumpkin, sweet pie pumpkin, and Waltham butternut squash. I stuck the tomato cages in to help support the sunflowers so the cucumbers can use them as a living trellis. The pumpkins will have a large trellis of their own and the squash may use the large Zohar sunflowers as support. Basically I've crammed every inch of the garden with as much produce as possible and will be growing vertically to save space. I can't turn a shovelful of dirt without finding at least one earthworm so I'm confident that the garden will be able to handle the load with some additional vermicompost tea to bolster the available nutrients.

So far I have 32 corn seedlings squeezed in here and as you can see, the bugs are already finding it. I believe this is the work of grasshoppers, but it could be something else. My main concern comes from cutworms and hornworms. Every time I've tried to grow corn previously they wiped out my crop. But I have a plan this time that should hinder the pests.

Another 16 or so corn plants are planted in the bed along with burgundy amaranth in the boarder next to the patio. Coco plum are turning out to be hard to find in the condition I want. I may choose to take samples and cuttings from wild plants to start my hedge if I can't find what I'm looking for in the nurseries.

I decided to put my mulberries into a large galvanized planter in the garden instead of incorporating them into the yet to be built garden bed. I think they'll make a handsome large shrub here. I won't have to restrict their growth as much here as I would have in the garden.

My little pollinator corner is abuzz with beneficial insects and native wasps. The fire bush in the right is over 5ft high and I'll let it grow to the 8ft roof. There is a smaller fire bush next to it along with milkweed, porter weed, and horsemint. The horsemint is especially popular. It re seeds itself every year and I just dig it up and move it where I want easy peasy.

Two more firebushes are hanging out here along with a bunch of sweet potato starts. They'll overwinter just fine on this west facing wall, and I'll take more cuttings for next summers sweet potato planting from these.