Here are my 5 November Entries for the November Celebrate Color Contest/Extravaganza! It has been so much fun designing new projects and creating with fellow crafters of various specialties this Fall and I'm sad that this is the last month. But, I am so excited that the end of Fall, means the Beginning of Winter and Christmas Holidays!
Needlepoint Entry: Happy Country Felt Garland
This is a pattern I adapted from Thimbleberries' designer Lynette Jenson's Book Classic Country Christmas. I love her work! Everything is so comfy and cozy and it all has her special handmade touch. Country style is nice to me because it makes you feel welcome and allowed to kick-back and relax. This Design is made with Brown and Deep Red Felt hearts stacked and Buttonhole stitched together with brown and gold thread. Each heart has a little Happy White Snowman outlined also with buttonhole stitches and detailed with French knots and outline stitching in Gold for the arms. The other Hearts have Gold Country stars buttonhole stitched in Brown thread to Brown outlining stars and fixed with contrasting Gold buttonhole stitches to the Heats. I used a spray adhesive and straight pins to hold things in place while I stitched it all together and whip-stitched the hearts to one another. Jenson designed this to be a round centerpiece base for a pot or candle, but I haven't found anything quite large enough yet to center it around. But I hope to soon. In the meantime the design makes me Smile :)
Yarn Entries: 1. First Snow Crochet Ornaments
This was the first time I used a itty-bitty size 4 hook for a little project. I have honestly been scared of the little stitches :) But this Pattern from BH&G for Decorative Ornament Snowflakes was just perfect and so easy!
2. Open Weave Crochet Scarf
This cutie is made with TLC variegated yarn. It's 86" long x 3" wide and is has a space between every stitch. Here in Florida, it doesn't get cold. It was 83 degrees outside today, so that makes scarves more of an accent than necessity. But we like to get in the spirit with fun fall accessories here anyways :) I can wear this folded in half loosely or wrapped tight for warmth or as a fun belt. It's super comfy and with various shades of Fuchsia, Cream, Tan, and Espresso, It goes with most anything!
Home Decor Entry: 1. Makeup Brush Roll
I am very proud of this original designed Makeup Brush Roll. I made it as a gift for my dear friend who is a Make-up Junkie and has a multitude of brushes that like to run astray. The outer layer is a Microfiber Polyester Suede with a Bright Pink Satin Lining and Brush pocket with Matching Pink Satin Ribbon Ties. I backed the thin satin with Fusible stabilizer to make it a bit sturdier. The brush space is 16" x 18" with 16 little brush pockets and 5 big pockets for foundation brushes or little make-up palates. I made a little flap on the side where the ribbons attach to help keep things together. I was so happy with how it turned out I even sewed on one of my satin stamp labels :) (My pictures on the other hand were taken at 1:30am and I'm not so proud of). My Friend loved it and can't wait to try it out.
2. Green and Blue Plaid Chenille Baby Blanket
This Blanket gave me a bit of a fit, but it all worked out in the end. I used Dana's tutorial from MADE to make this soft and cuddly Chenille blanket. The outer layer is a homespun plaid, and the Chenille is made with a layer of white broadcloth cotton sandwiched between two layers of blue flannel. I made the Bias tape binding from the same homespun plaid and love how the bias angles contrast against the pattern. This is going to be a Christmas gift for my youngest son who doesn't yet have a quilt from me :) The quilt measures about 32"x 38".
Thanks for Checking out my little projects and Thanks to all the Folks who have made the Celebrate Fall Color Event such a Success!!!
Saturday, November 26, 2011
Wednesday, November 23, 2011
Fisticuffs and Other Shenanigans
I Started making a layered Chenille Blanket for a baby shower gift because it looked easy (ha ha), and oh yeah, the baby shower was less than 24hrs away so I had one night to trow it together. But it was just sewing straight lines and cutting and washing it to make it fuzzy, so I decided to go for it. Here is where you shake your head and laugh because you know (and by now I should know too) that you never make something "new" for a gift on a deadline. But I did. Needless to say, this was not the gift that I gave at the baby shower (that was 2 weeks ago). I made her a cute disposable-diaper cake around an empty tall formula can and whipped up a fleece contoured changing pad cover (I've made those before and even saved my pattern) that I stuffed into the formula can. Cute bow on top, and wha-lah.
Back to my Chenille blanket...
I used Dana's Tutorial from MADE, which really is excellent, and I would consider making one of these things again doing it her way with the right fabrics. And Alan even made me a nifty tool to cut the fabric using a razor blade letter opener, but the flannel was too thick to use it.
So...
Remember the Plaid Fabric from Redding's Bias Trimmed Smock? Here it is again, and here is 2yds light blue flannel, and 1yd plain thin white cotton broadcloth. I Layered and sprayed my fabrics with the white sandwiched between the 2yds of blue that I have beef with because it wasn't 45" or even a full 2yds as the pre-packaged fabric label claimed (You Suck Walmart!) so my blanket finished at about 30" x 36" instead of the 36"x45" it should have been. Whatever.
Here is the infamous cut and patch in the fabric.I had to patch over about 3 rows to completely cover the cut and then sew over top of it. It's not too bad.
I really do like the blanket now that it's finished and cute. I'm still in love with the plaid even after all that and am using the rest of the binding to make placemats and napkin rings for my table.
On to cute projects that turn out right the 1st time. I'm entered in an ornament swap with my Etsy Street Team, the Fabulous Artistic Moms and started looking for some ideas. I love the look of crocheted snow flakes, but have always been a tad scared of them because of their using doily size thread. Super fine and it intimidates me. But I want to carry on the tradition of my Great Grandmother -Mama Bea- who taught me to crochet when I was eleven, and learn to make beautiful doilies like her.
I found this pattern on BH&G website and after looking at some completed projects of these on Flicker, decided to whip out my doily thread and hook. It turned out perfect. And the directions were great. And all I need to do now is grab some fabric stiffener to finish this puppy up. And maybe some sparkley spray paint. I dunno just yet. My question is.... Would this be cute for my ornament swap and something everyone would like, or should I go with something else? I do have a back-up plan that is more trendy. Last year I bought all the stuff to make little hanging air plant ornaments similar to this but in glass ornaments instead. That is also an option. I am just not sure what to send. What do you think?
Back to my Chenille blanket...
I used Dana's Tutorial from MADE, which really is excellent, and I would consider making one of these things again doing it her way with the right fabrics. And Alan even made me a nifty tool to cut the fabric using a razor blade letter opener, but the flannel was too thick to use it.
So...
Remember the Plaid Fabric from Redding's Bias Trimmed Smock? Here it is again, and here is 2yds light blue flannel, and 1yd plain thin white cotton broadcloth. I Layered and sprayed my fabrics with the white sandwiched between the 2yds of blue that I have beef with because it wasn't 45" or even a full 2yds as the pre-packaged fabric label claimed (You Suck Walmart!) so my blanket finished at about 30" x 36" instead of the 36"x45" it should have been. Whatever.
Ok, Here you can see I have started quilting my fabric to find out that, yes, I should buy a walking foot for my sewing machine. Lots of wavy lines and unevenness on both sides, but it's only noticeable on the front. I even tried to do it the right way by starting in the middle and working my way out, but alas, well... you see it.
And here's where the crap REALLY hit the fan. I started cutting my lines in the fabric to make the chenille, and I was only supposed to cut through the 2 blue layers and the white layer leaving this back piece whole. But no. A dozen rows in, I whacked through all 4 layers in a serious way. Dana over at MADE, shows how to fix a super small hole that she cut into her fabric with fusible web. I began this method also, because, well what else was there to do. I was too many hours deep into this project to chuck it. So I got things all lined up-or so I thought- and then realized my stripes would not line up no matter how I turned the fabric patch. About 30min after staring at the stripes going "HOW IS THIS POSSIBLE?!" I realized that the homespun fabric doesn't have a right or wrong side, and that I had fused the fusible web to the opposite side of the fabric than I should have, and I was trying to match a mirror image patch of the plaid to my blanket. I re-cut the fabric and matched it up as best I could because my fabric was stretched and katty-whompus from my wavy stitches.
Moving on... If you decide to make this project, I suggest you follow Dana's directions exactly and use only quilting cottons for the front and broadcloths for the chenille layers. I ran into massive amounts of trouble trying to cut through the layers of flannel and ended up buying new little Fiskars-looking kid craft scissors to use. That made things much easier. I also recommend washing and drying your blanket BEFORE you start cutting the layers. It is easier to let the wash take the spray adhesive out instead of trying to separate it from the back fabric and layers you want to cut with your scissors. It was a nightmare. I washed it twice before all my adhesive came out.
But Here It Is! All Soft and Lovely and Innocent looking. I used the bias binding I already had made from my last project on the blanket. I like it with the bias-plaid stripes anyways. This will be one of Wyatt's Christmas presents. Redding has 2 quilts already, and little Wyatt needs one of his own.
Here is the infamous cut and patch in the fabric.I had to patch over about 3 rows to completely cover the cut and then sew over top of it. It's not too bad.
I really do like the blanket now that it's finished and cute. I'm still in love with the plaid even after all that and am using the rest of the binding to make placemats and napkin rings for my table.
On to cute projects that turn out right the 1st time. I'm entered in an ornament swap with my Etsy Street Team, the Fabulous Artistic Moms and started looking for some ideas. I love the look of crocheted snow flakes, but have always been a tad scared of them because of their using doily size thread. Super fine and it intimidates me. But I want to carry on the tradition of my Great Grandmother -Mama Bea- who taught me to crochet when I was eleven, and learn to make beautiful doilies like her.
I found this pattern on BH&G website and after looking at some completed projects of these on Flicker, decided to whip out my doily thread and hook. It turned out perfect. And the directions were great. And all I need to do now is grab some fabric stiffener to finish this puppy up. And maybe some sparkley spray paint. I dunno just yet. My question is.... Would this be cute for my ornament swap and something everyone would like, or should I go with something else? I do have a back-up plan that is more trendy. Last year I bought all the stuff to make little hanging air plant ornaments similar to this but in glass ornaments instead. That is also an option. I am just not sure what to send. What do you think?
(By the way, if you zoomed in on this picture you will notice the brown stains in the thread. I have no idea how the thread got stained, but this was the only thread I had to work with. I will be replacing it or painting it with silvery glittery paint. Or bleaching it.)
Sunday, November 6, 2011
Bias Trimmed Apron
I Loved making this apron! It was a breeze! And I learned a few new and important skills: How to make and Use Bias Tape Correctly, and How to make a French Seam. I've been dallying about making bias tape. It has always seemed so daunting. Hours of folding and pressing and refolding and repressing.... Just for a few measly yards to make a quilt. But Now! I learned about the nifty little bias tape maker helper, and how to make it with only sewing 2 seams! That was the best. I gotta tell you, I loved the Prudent Baby method our fearless leader Jessica suggested as requiring way less sewing. It was great! While sewing isn't something I despise (obviously), it was much nicer to get to watch tv whilst I spent 95% of the time pressing and cutting the tape.
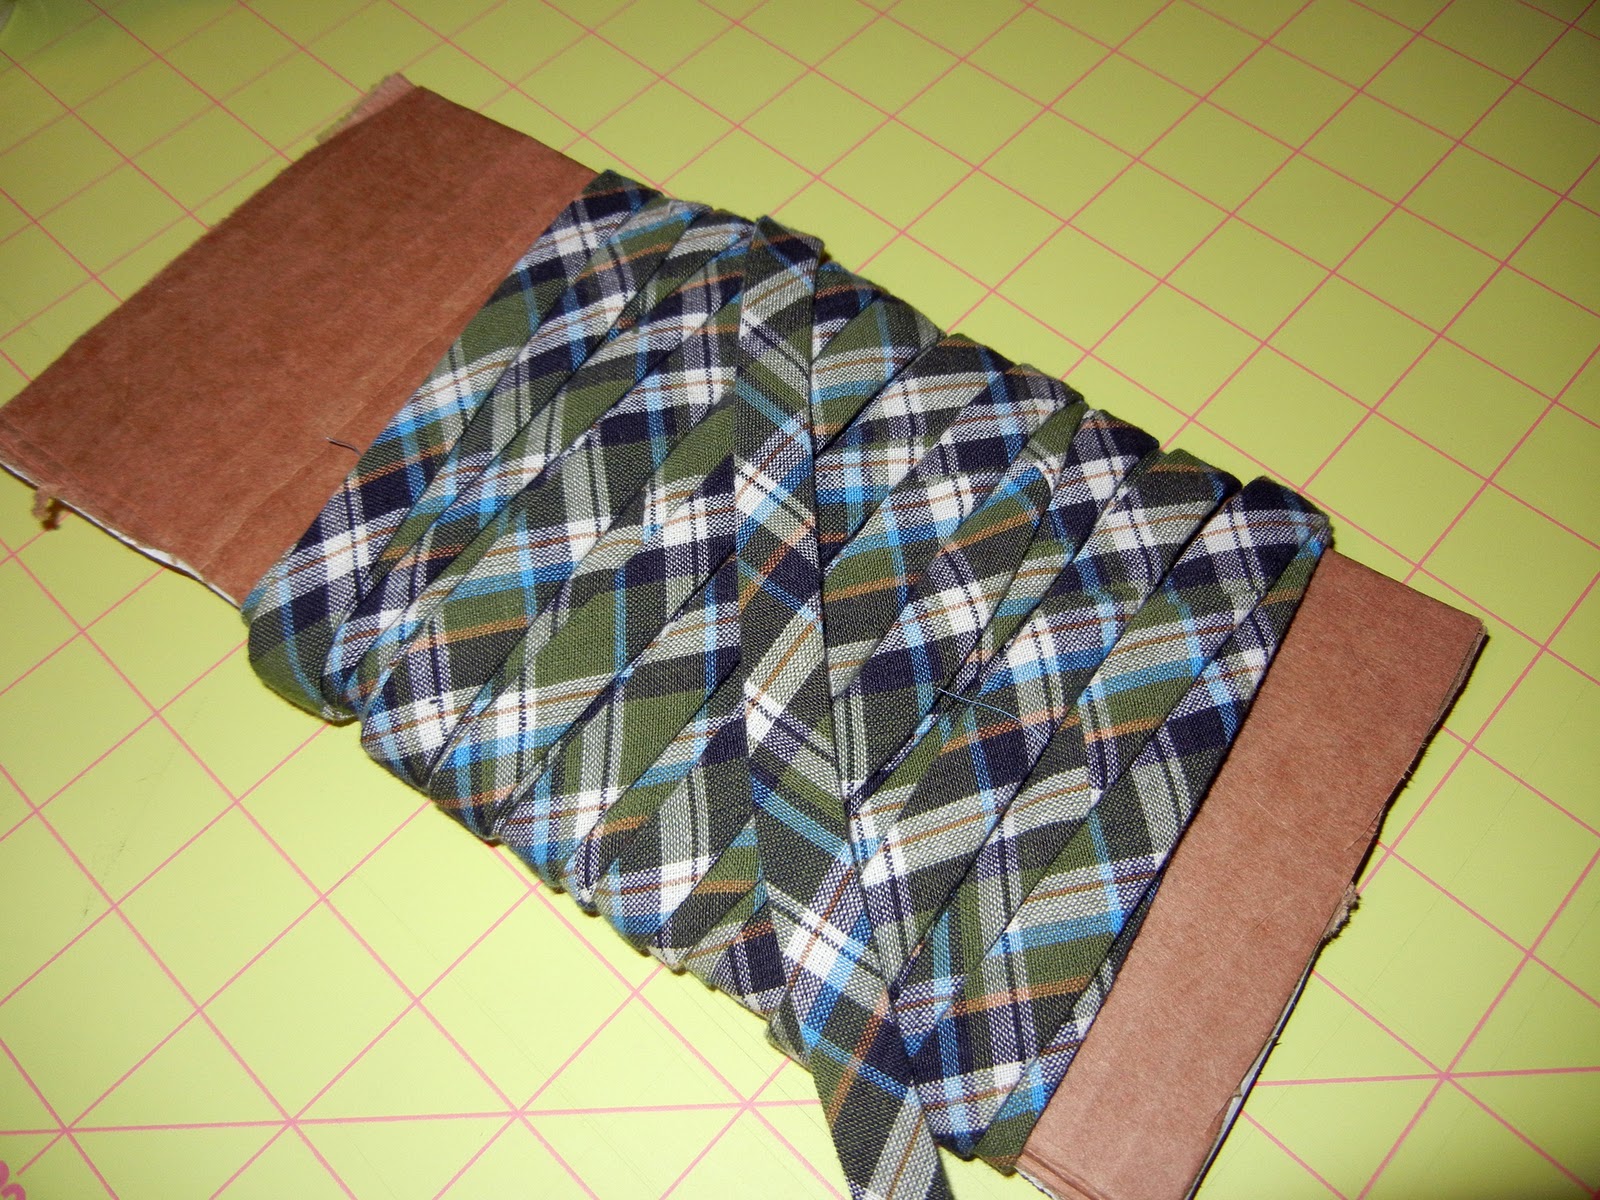
And Here's My Bias Trim Tape!
I used a half a yard of this great Green, Grey, Navy, and Blue Plaid Homespun Cotton fabric that has been staring me in the face for months now. I always pick it up, unroll it, look at it (even prewashed it) and put it back on the shelf. And now I used it! On the other hand, while it looks really cute, I don't really recommend using Homespun Cotton because it doesn't hold a crease well. Now I love it and plan on using it for several other projects soon, but it isn't crisp like quilting cotton if that's what you're looking for in your bias tape.
I appliqued an "R" to the front of the smock since it is just a matching solid blue fabric, in an attempt to make it more boyish. I'm not sure it helped. It still looks like a dress to me (and Alan, who wasn't thrilled with Redding running around with "a dress" on all day) Hehe.
But Redding loves it! He has worn it almost all day and likes the pockets on the sides. The fit is Perfect, which surprised me for some reason because most things I make don't have such a nice fit.
We plan on wearing it for sidewalk chalk, fingerpaints, gardening, and cooking. I might have to make one for me too :) I'm very messy.
I'm really looking forward to this month's project (I'll be making the Cozy Winter Hood) and will probably make one for each of my boys, and several for Christmas gifts.
And Here's My Bias Trim Tape!
I used a half a yard of this great Green, Grey, Navy, and Blue Plaid Homespun Cotton fabric that has been staring me in the face for months now. I always pick it up, unroll it, look at it (even prewashed it) and put it back on the shelf. And now I used it! On the other hand, while it looks really cute, I don't really recommend using Homespun Cotton because it doesn't hold a crease well. Now I love it and plan on using it for several other projects soon, but it isn't crisp like quilting cotton if that's what you're looking for in your bias tape.
I appliqued an "R" to the front of the smock since it is just a matching solid blue fabric, in an attempt to make it more boyish. I'm not sure it helped. It still looks like a dress to me (and Alan, who wasn't thrilled with Redding running around with "a dress" on all day) Hehe.
But Redding loves it! He has worn it almost all day and likes the pockets on the sides. The fit is Perfect, which surprised me for some reason because most things I make don't have such a nice fit.
We plan on wearing it for sidewalk chalk, fingerpaints, gardening, and cooking. I might have to make one for me too :) I'm very messy.
I'm really looking forward to this month's project (I'll be making the Cozy Winter Hood) and will probably make one for each of my boys, and several for Christmas gifts.
Subscribe to:
Posts (Atom)